


Mini Split Installation Guide
How to Install a Mini Split
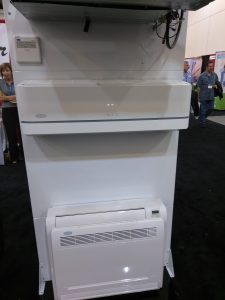
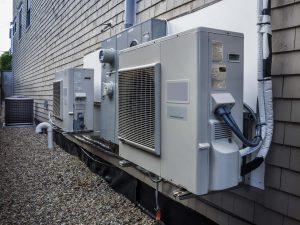
air conditioning installation
Mini Split is a small, efficient, flexible, and ductless form of heating and cooling system. Apart from concentrating the entire house, the Mini-split works to heat and cool only targeted spaces or individual rooms and saves energy cost by focusing on the areas that need it. It aids in inefficiency, energy-saving, cost-saving, and keeps you comfortable in your living space.
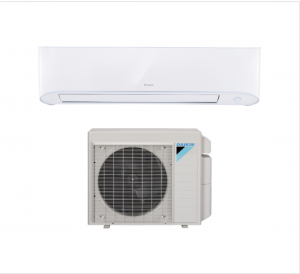
Unit Parts
- Indoor Unit
- Out Door Unit
- Refrigerant Piping
- Air Evacuation
Supplies/Accessories Required
- Manual
- Drain joint
- Seal
- Mounting plate
- Fixing screws
- Remote controller holder(optional)
- Remote Controller
- Battery
- Small filter
- Connection Pipe assembly
Tool Required
- A torque wrench set
- Power drill with drill bits
- Plastic anchors
- Wooden screws
- Level
- Insulating tape
- Anchor
- Clamps
- Needle nose plier
- Hand saw
- Screwdriver
- Power Cable (some units)
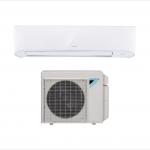
Installation of mini split Indoor unit
mini-split air conditioning installation
Step 1: Installation location
Before installing the Mini Split system must select the appropriate location. Following are the standards that help you to choose a proper place for the system units:
- A location should be away from electrical devices
- Solid and un vibrate able location
- Good air circulation
- Away from the doorway
- Convenient drainage
Step 2: Connects the mounting plate with the wall.
- Drill a 5mm-diameter hole in the wall and insert the sleeve anchors.
- Screw the mounting plate to the wall. The mounting plate should be flat against the wall.
Step 3: Drill wall hole for piping assembly
- Select the location of the wall hole according to mounting plate dimensions.
- Drill a hole 65mm or 90 mm (depending on the model).
- Place wall cuff in the hole that protects edges of the cave and will help seal when finishing the installation process.
Step 4: Routing the refrigerant piping
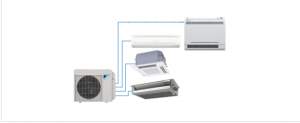
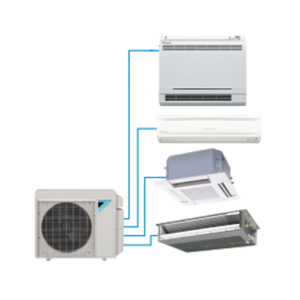
Daikin MXS Series Multi-Zone (2, 3, 4 or 5 zones)
An insulating sleeve is attached to the unit back, and you must prepare the refer piping system before passing it through the hole in the wall.
- The wall hole’s position relative to the mounting plate and determine the side from which the piping will exit the unit.
- If the wall hole is in the unit and keeps the knock-out panel in place. If it is to the indoor unit’s side, remove the plastic knock-out panel from that side of the company. It will create a slot through which your piping can exit the unit. By using a needle nose plier, remove the plastic panel if it is too difficult to remove by hand.
- The slot size is determined by the diameter of piping, although grooves have been made in the knock-out panel to cut it conveniently.
- To join the indoor and outdoor unit, connect the indoor unit,s refrigerant piping to the connective piping.
Step 5: Drain hose connection
- Drain hose can be attached either left or right side; however for proper drainage and attach the drain hose on the same side in which your refrigerant piping exits the unit.
- Attach the drain hose extension to the end of the drain hose.
- Wraps the connection points firmly with tape to prevent leaks.
- Remove the air filter, pour some water into the drain pan to ensure that water flows smoothly from the unit.
Step 6: Power cables connection
- Make all the electrical connections of indoor and outdoor units according to the given diagram on unit panels.
- Check voltage that should be according to given specifications.
- Connect the unit to individual branch circuit outlets.
Step 7: Mount indoor unit
- Pass the wrapped bundle of pipes, drain hose, and wire through the hole in the wall.
- On the mounting plate, hook the indoor unit.
- Ensure the unit is hooked firmly.
- Connect pipe and drain hose properly.
- Do electrical and leak checks.
- wrap the connection point with an insulation tap.
Installation of the outdoor unit
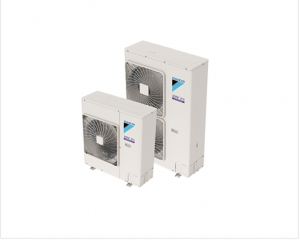
Daikin’s VRV IV-S Series
Step 1: Installation location
- Choose an appropriate location
- Consider space requirements
- Good air circulation
- Solid place
- Protected from rain and sunlight
- Away from animal and plants
Step 2: Install drain joint (heat pump only)
- Install the drain joint at the unit’s bottom before bolting the outdoor unit at the place.
- Insert the drain joint into the hole and in the base pan of the unit.
- The drain hose must be as vertical as possible to ensure quick water drainage.
Step 3: Install the outdoor unit.
- Outdoor unit can be installed on the wall-mounted bracket with a bolt or on the ground according to the given dimensions.
- For installing the outdoor unit on the ground following should be ensured
1. Mark positions for expansion bolts based on a given dimension
2. Drill hole for expansion bolts
3. Install bolt in pre-drilled holes
4. Place the outdoor unit on bolts
5. Place a nut and using wrench tight until snug
Step 4: power and signal cables
- Prepare respective line for connection
- Remove electrical wiring cover
- According to the wiring diagram, connect with the wire to its corresponding terminals.
- Ensure every connection secure.
- Replace wire cover on the side of the unit and screw it in place
Connection of mini split Refrigerant pipe
air conditioning installation downey
While connecting refrigerant pipe doesn’t let substances or gasses other than the specified refrigerant enter the unit, such thing can cause explosion and injury.
- While preparing refrigerant pipe, take extra care to cut, flare them properly to ensure efficient operation and minimize future maintenance.
- Measure distance between the units
- Cut the pipe little longer than the measured
- Cut the pipe 90-degree angle
- Using tools remove all burrs from the cut section of the pipe
- Seal the end with PVC pipe
- Sheath the pipe with insulating material
- Place the flare nuts on both ends of the pipe
- Remove PVC tape from ends
- Clamp flare form at the end of the pipe, and place flaring tool onto the paper. Turn the flaring tool’s handle clockwise until the line is fully extended, remove the flashing tool, and flare form.
- Connect the low-pressure pipe and then high-pressure line respectively, tight the flare nuts.
Test Run Your Mini Split
- Connect power to the unit
- Turn the units
- Check cool and heat for at least 30 minutes
- Check the gas leak


